Showing posts with label vacola. Show all posts

Saturday, 1 February 2014

Pasta Sauce in the Fowler's Vacola


I have just returned from my cruise to Sydney, which was supposed to be the Whitsundays but was changed due to the cyclone. We had a wonderful time and I will post about it this week. Today I just want to catch up on some posts which I have promised...but never delivered. How very slack of me! :)

During my holidays I made pasta sauce using my Fowler's vacola (not necessary to use one, but it is a new toy so I got to use it again). I adapted a recipe from Green Living Australia which came with the replacement lids I ordered. I waited to finish this post as I wanted to use the sauce to make a bolognese first and make sure it was really good...and it is! This recipe made seven jars of sauce for around $2 per jar - with no preservatives or colours. Perfect!


Ingredients

5kg tomatoes
5 medium onions
4 medium capsicum
1 tbs basil
1 tbs salt
1 tbs Oregano
4 tbs sugar
5 cloves of crushed garlic


Chop the tomatoes, onions and capsicums and place in a large stockpot. Bring to the boil (the mixture has no liquid added but creates its own as the tomatoes cook), stirring occasionally. Reduce heat to low to medium and simmer. Add the salt, basil and oregano. Add the sugar one-tablespoon at a time, stirring between each addition and leaving 15 minutes before adding the next tablespoon. Taste in between additions as the level of sugar required varies due to the sweetness of your tomatoes.


Continue cooking the sauce for two and a half to three hours. The sauce will reduce as the excess liquid cooks off and the sauce will become thicker in consistency. I then filled my sterilised (and still hot) jars with the sauce, and added a teaspoon of lemon juice before sealing and placing them into the vacola. Some tomatoes are less acidic than others so the lemon is required. Usually the vacola is filled with cold water but as I did not want to crack the bottles I added warm water and processed for 30 minutes, removing the bottles just before the water boiled. The instructions from Green Living Australia state to process in a water bath for 20 minutes so I figure I followed this pretty closely.


I would also think that you could make the sauce without using a water bath as both the liquid and the jars are hot before sealing and create a vacuum, however, I believe I will have a longer shelf life by using the vacola. I would love to hear any feedback on this if you know?


This is my finished result, using my old pasta sauce jars which I have been collecting for months and my new lids.


And this is the bolognese that my homemade pasta sauce produces. All natural, tasty and easy to prepare. I will definitely be making all my own pasta sauce from now on. The preserving leaflet from Green Living Australia also included a recipe for Salsa so that may be next on my list :)

Do you make your own pasta sauce?


Thursday, 16 January 2014

Fowler's Vacola Preserving with Mason Jars Part 2


This is the result of my second day of preserving in the mason jars. Not as colourful as the first batch but I did get creative with liqueurs. The jar on the left is an experiment with apple, the middle one is fruit salad in brandy syrup and the third bottle is cointreau apricots. I thought I would share the recipe for the apricots which came from a combination of sources.


I started with 500g of dried apricots. The finished quantity of preserves filled three jars.


Soak the apricots in two cups of water overnight and they plump out like this. Drain and retain the liquid.


Thinly slice an orange and the rind, removing all of the white pith.


Starting with the apricots, alternatively layer the peel and oranges until filled half way. Then add two tablespoons of cointreau and two tablespoons of sugar to the reserved liquid. Mix and then add to the jar (to about three quarters full). Continue layering until jar is filled. Top with liquid to 1.2cm from the top and seal. Can't wait to try these out after the apricots have been soaking for months. Yummo!


I had some leftover green apples from my chutney making so I decided to bottle them. As they are low in acidity I added a teaspoon of lemon juice to each bottle before sealing. I did these in a light sugar syrup.


In hindsight I should have cooked them a little as they have absorbed a fair amount of the liquid. A lesson to be learned :)


This is my liqueur fruit salad. I had a few peaches, which many recipes suggested preserving with brandy, but I did not have enough to fill a jar. So I added some grapes, apple and mango to the mix. I added the brandy (which I had leftover from my Christmas Cake) to the light syrup with a tablespoon of sugar.


When I was shopping for the jars at Big W, I was impressed with the range of Ball products. These labels, however, were a big disappointment. I thought the dissolvable factor was clever, but they fell off the jars as soon as I moved them. Maybe there is a trick to getting them to stick? There are no instructions with the product to suggest so.


This wide-mouthed collapsible funnel, though, is one of my favourite things. The green rubber adheres to the side of the jar creating a great seal. I did learn (the hard way) to watch the side of the jar as I filled because you can't really tell from the top when you have overfilled. You just see green :)


Having a good quality stainless steel sieve was also handy when making the sugar syrup. It's a good idea to strain to ensure no impurities get into it. Also, by boiling the syrup, it remains clear and does not cloud up in the jar - apparently.

Well, it took me a bit of time to get around to Part 2 of my mason jar preserving posts. The next recipe and process I will share is pasta sauce. We certainly go through loads of it here.

What do you use lots of that you would like to make yourself, preservative and chemical free?


Monday, 6 January 2014

Fowler's Vacola Preserving With Mason Jars Part 1


This beautiful selection of local produce inspired a two-day preserving festival this week. As I had decided to use the smaller jars Paul gave me for Christmas for my chutneys, jams and relishes, I decided to purchase some Mason jars from Big W. My replacement lids for my recycled supermarket jars were not due to arrive until next week...and I was keen to do some more preserving. Warning, it is an addiction. If you missed my first attempt at preserving here is the link Fowlers Vacola Preserving.


I had purchased the Blue Book Guide to Preserving some time ago. Although it is printed in America and they do some things differently in terms of preserving, this book is full of recipes and knowledge with regards to preserving in a water bath. I came across several sites in my research who had used the above Mason jars in their Fowler's Vacola, and as they are about half the price, I thought I would give it a go. Twelve jars cost $30, and the lids which need to be replaced each time, are only $4 for a set of twelve. The lid sits on top of the jar and the ring is then screwed on.


This is my selection of jars pre-preserving. A beautiful array of colour...shame they don't stay as vibrant when heated.


My first selection was to bottle some of the amazing lychees available at the moment. These are locally grown and about $5 a kilo at the moment - enough to fill two jars except we ate a few too many for that.


If you have never tried them before I urge you to give them a go. They are very unusual and hard to describe but the flesh is sweet and juicy, underneath an easy to peel crusty red shell.


They look a little like pickled onions or grotesque eyeballs prior to going into the Vacola.


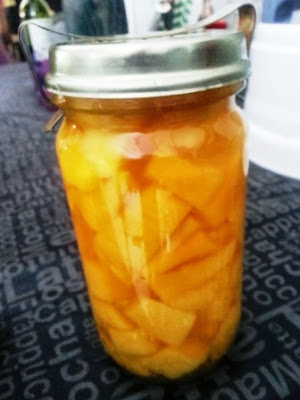
I preserved them in a light sugar syrup and this is the end result. 


One of the recipes in the Vacola manual was for fruit salad so I combined peaches, nectarines, grapes, orange and banana as suggested. Once again I used a light sugar syrup.


This is the end result. Reminds me of the canned fruit salads where the grapes are firm and the bananas are mushy...but still yummy.


This is my first attempt at pickling vegetables. This is called an antipasto selection and the liquid used is 50% water and 50% vinegar (you can use any vinegar you like). I added some cracked black pepper and a sprig of rosemary for extra flavour.


The end result has stripped alot of the beautiful colour but I am sure it will be tasty. The squash, Zucchini and Rosemary and spring onions were all sourced from my garden.


The green grapes are lovely and sweet at the moment. This is a preserve called Honey Grapes which has a little brandy and honey added to the light syrup. Will be interesting to see what it tastes like.


This photo makes them look a little yellow. They are more like a faded green.


Finally, one of my favourite fruits...cherries! They are very expensive up here ($15 a kilo) so I only did one jar. But they will be appreciated in winter. Once again I used a light syrup.


The cherries still look beautiful and red.


I processed all of the jars in the Vacola for the recommended one hour, starting with cold water. I could have fit a couple more but I have six more jars left to fill which is another even batch. The trick with these jars is to not tighten the rings too tight so that air can escape to create the vacuum. The instructions say 'finger-tight only'.


Once cooled for at least 12-18 hours you remove the rings to check the seals. These lids do not budge and also require a tool to remove. You can store them with or without the rings. 


The feeling of sitting back and admiring your colourful jars is one that I have heard many people talk about. It is taking what you have grown (or in this case bought farm local) and taking it to the next step. Sure, I could have frozen some of these things instead, but this way they can remain on the shelf for at least a year, maybe longer. It did not take alot of time to do and once I have a surplus in my garden...I now have another way of storing it for later use.

Tomorrow I will show you what I did with the other six jars...I got a little more creative.


Saturday, 4 January 2014

Fowler's Vacola Preserving

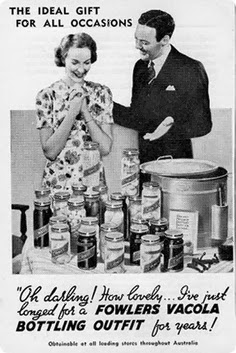
Image Source

I had heard of a Fowler's Vacola before my husband gave me one for Christmas, but I am not sure where. I don't recall my mother or grandmother using one, and I don't think my reaction was the same as the lady above when I opened my gift. I thought it was a fantastic gift and so very thoughtful - a preserving kit...but I didn't really know what all that meant. Now that I have researched it, used it, and am building up a great collection of fresh, all natural preserves...I must admit that maybe I have always truly longed for one, without even knowing it! I know that when I bake bread I always have a sense of the 1950's housewife about me, picturing the flouncy skirt and frilly apron with my hair neatly coiffed, as I set about being the perfect housewife and mother...now there is no stopping that fantasy :)


There are a few different types of Vacola which you can check out on their website Fowlers Vacola if you are interested. This is the Simple Natural Preserving kit designed for home use. It has a big white urn which you place near a sink so that you can easily drain it afterwards ( I re-use the water, once it's cooled, for the plants on my verandah).


This is inside the Vacola where the jars sit. Underneath is an element that heats the water when the power is turned on. You can achieve the same effect by heating a large pan of water on a stovetop and using a cake rack on the bottom, to create a water bath. The benefit of the Vacola is that after an hour the temperature is a correct 90 degrees or so and has not reached boiling point which is important...and your kitchen is not heated up by having the stove on.


This set comes with three jars, which come with a rubber ring, lid and clip. These are expensive to buy but once you have them you only need to buy new rings each time as the lids and clips can be reused if looked after. I have heard of families which have passed their Vacola jars down through generations, and a quick search of Ebay reveals the older jars are well sought after.


This is a selection of produce I purchased from the market for my first experiment with preserving.


The jars are prepared by washing and rinsing. The rubber seals are soaked in warm water for fifteen minutes and then placed on the bottles. As the liquid and fruit you are putting in for this type of preserving is cold, the jars do not need to be heated. If I were doing jams or chutneys where the liquid is hot then the jars would also need to be hot to avoid breakage.


The first fruit I chose to preserve was nectarines. I absolutely love them and they aren't around for very long up here, plus they look very colourful. Unlike peaches, you can preserve them with their skins on. You add some of your liquid to the jar (about a quarter full) before adding the fruit, which reduces the air pockets. I used a light sugar syrup - about 1/2 cup sugar boiled with 4 cups of water (and cooled). You can also use fruit juice or add a drop of raspberry cordial for colour. There is a packing stick which doesn't come with the kit, which helps you push the fruit down and remove air pockets - I used a small wooden spoon which seemed to do the job.


I love the look of bottled kiwi fruit.  These are also preserved in the light syrup. You fill the jars, leaving 12mm of headspace.


Lastly, I bottled some local mangoes. These are under $1 each at the moment so I will be bottling some more, while they last. As they are not as acidic as the other fruits, the recipe book states to add citric acid or lemon juice to the bottle before sealing. I chose lemon juice as I had a few in the basket.


The jars are sealed and clipped (which was a little tricky), and then covered with cold water. This Vacola holds six jars but I only had three at the time. You then turn the Vacola on and set the timer for one hour.


This is an action shot (haha) showing that after one hour the water was just starting to bubble. They do suggest checking the Vacola to be sure the water does not boil before the hour. Five minutes of boiling is okay but not ideal, any longer and I think you need to start again...they are not specific about that one.


This is my finished product, taken out of the Vacola once the water was drained. I did not have a jar lifter so I used tea towels - they were mega hot! You can see the nectarines and kiwi fruit have risen to the top which is acceptable. They will settle down in time. Once the jars have sat and cooled undisturbed for 12-18 hours, you then remove the clips and test the seals. You can feel that the lid is depressed in the middle and you check that the sides of the lids cannot be lifted. If you don't get a good seal you can put the lids back on and try again. The good news was...my lids would not budge! Apparently to get them open you need a special tool.

The instructions recommend leaving them for 60 days before using, and storing them in a cool dark place - not the top shelf of your pantry, because hot air rises. Due to the heat at the moment I have them in an esky to make sure.

This is what they look like after a week:


The Kiwi Fruit have settled down and the nectarines are almost there. I just need to check them every now and then to make sure there is no mould and that the seals remain tight. Apart from that...I can't wait to enjoy my summer fruits in winter - preservative free.

I should note that I have followed the directions from Fowler's but there may be other ways of doing this, and I am certainly not an expert...this being my first time and all. If you have any suggestions or tips please share them. I am really keen to learn.

My next post will be about preserving in the Vacola with Mason jars.
Related Posts Plugin for WordPress, Blogger...