 |
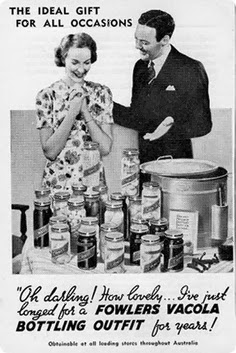
| Image Source |
I had heard of a Fowler's Vacola before my husband gave me one for Christmas, but I am not sure where. I don't recall my mother or grandmother using one, and I don't think my reaction was the same as the lady above when I opened my gift. I thought it was a fantastic gift and so very thoughtful - a preserving kit...but I didn't really know what all that meant. Now that I have researched it, used it, and am building up a great collection of fresh, all natural preserves...I must admit that maybe I have always truly longed for one, without even knowing it! I know that when I bake bread I always have a sense of the 1950's housewife about me, picturing the flouncy skirt and frilly apron with my hair neatly coiffed, as I set about being the perfect housewife and mother...now there is no stopping that fantasy :)
There are a few different types of Vacola which you can check out on their website Fowlers Vacola if you are interested. This is the Simple Natural Preserving kit designed for home use. It has a big white urn which you place near a sink so that you can easily drain it afterwards ( I re-use the water, once it's cooled, for the plants on my verandah).
This is inside the Vacola where the jars sit. Underneath is an element that heats the water when the power is turned on. You can achieve the same effect by heating a large pan of water on a stovetop and using a cake rack on the bottom, to create a water bath. The benefit of the Vacola is that after an hour the temperature is a correct 90 degrees or so and has not reached boiling point which is important...and your kitchen is not heated up by having the stove on.
This set comes with three jars, which come with a rubber ring, lid and clip. These are expensive to buy but once you have them you only need to buy new rings each time as the lids and clips can be reused if looked after. I have heard of families which have passed their Vacola jars down through generations, and a quick search of Ebay reveals the older jars are well sought after.
This is a selection of produce I purchased from the market for my first experiment with preserving.
The jars are prepared by washing and rinsing. The rubber seals are soaked in warm water for fifteen minutes and then placed on the bottles. As the liquid and fruit you are putting in for this type of preserving is cold, the jars do not need to be heated. If I were doing jams or chutneys where the liquid is hot then the jars would also need to be hot to avoid breakage.
The first fruit I chose to preserve was nectarines. I absolutely love them and they aren't around for very long up here, plus they look very colourful. Unlike peaches, you can preserve them with their skins on. You add some of your liquid to the jar (about a quarter full) before adding the fruit, which reduces the air pockets. I used a light sugar syrup - about 1/2 cup sugar boiled with 4 cups of water (and cooled). You can also use fruit juice or add a drop of raspberry cordial for colour. There is a packing stick which doesn't come with the kit, which helps you push the fruit down and remove air pockets - I used a small wooden spoon which seemed to do the job.
I love the look of bottled kiwi fruit. These are also preserved in the light syrup. You fill the jars, leaving 12mm of headspace.
Lastly, I bottled some local mangoes. These are under $1 each at the moment so I will be bottling some more, while they last. As they are not as acidic as the other fruits, the recipe book states to add citric acid or lemon juice to the bottle before sealing. I chose lemon juice as I had a few in the basket.
The jars are sealed and clipped (which was a little tricky), and then covered with cold water. This Vacola holds six jars but I only had three at the time. You then turn the Vacola on and set the timer for one hour.
This is an action shot (haha) showing that after one hour the water was just starting to bubble. They do suggest checking the Vacola to be sure the water does not boil before the hour. Five minutes of boiling is okay but not ideal, any longer and I think you need to start again...they are not specific about that one.
This is my finished product, taken out of the Vacola once the water was drained. I did not have a jar lifter so I used tea towels - they were mega hot! You can see the nectarines and kiwi fruit have risen to the top which is acceptable. They will settle down in time. Once the jars have sat and cooled undisturbed for 12-18 hours, you then remove the clips and test the seals. You can feel that the lid is depressed in the middle and you check that the sides of the lids cannot be lifted. If you don't get a good seal you can put the lids back on and try again. The good news was...my lids would not budge! Apparently to get them open you need a special tool.
The instructions recommend leaving them for 60 days before using, and storing them in a cool dark place - not the top shelf of your pantry, because hot air rises. Due to the heat at the moment I have them in an esky to make sure.
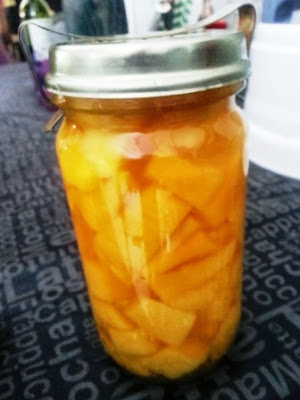
This is what they look like after a week:
The Kiwi Fruit have settled down and the nectarines are almost there. I just need to check them every now and then to make sure there is no mould and that the seals remain tight. Apart from that...I can't wait to enjoy my summer fruits in winter - preservative free.
I should note that I have followed the directions from Fowler's but there may be other ways of doing this, and I am certainly not an expert...this being my first time and all. If you have any suggestions or tips please share them. I am really keen to learn.
My next post will be about preserving in the Vacola with Mason jars.


I am struggling with fowlers system, I can't put the rubber on a hot jar for jam, I need to heat the jar, but not the rubber..., then almost spilled jam on myself trying to fit the rubber ring to a hot jar AND make sure it wasn't twisted. Then the clip, my hands are older now and I struggled to fit the clip on the jar...Awful system. Bring back screw jars.
ReplyDelete