Monday, 30 September 2013

Simple Living is Self Improvement

When I first heard the term 'simple living' a few months ago I was instantly intrigued. Although the term itself was not familiar, it was like a light-bulb moment when the concept was explained to me. The idea of growing my own food, making my own things (food, cleaning products, clothing) and reducing my carbon footprint was a dream of mine that had been swept away by a brown tide of floodwater. Simple Living was the main reason Paul and I had bought our acreage - to be self-sufficient and raise our kids in a simple, rural manner. In that light-bulb moment I realised that I was in a rut, I wasn't doing or achieving everything that I wanted to from my home...and my life. I had finally given up because of the flooding. If I hadn't started analysing my life earlier this year then I may just have missed this opportunity to turn that thinking around...and I certainly would have lacked the motivation to delve headfirst into it.

My talented stepson Sam took this sunset photo up the road
from our place
My self improvement journey commenced this January with quitting smoking, minimising my alcohol consumption, starting at the gym and eating healthily. The sense of satisfaction these three changes have given me is indescribable - the amount of guilt that has been lifted from my shoulders is immense. I no longer have the feeling that I am slowly killing myself. I breathe, smell and taste things better.  I have lost seven kilos and am fitter and stronger than I have been in years. More than that...I am proud of myself and what I am becoming again. Me!

Enjoying new places and experiences in Thailand
It makes sense that the concept of simple living is a natural extension of this journey for wellbeing, for self improvement. The positive changes to my lifestyle and the easing of my conscience by adopting  those positive changes, is a process that keeps evolving. It is not just limited to me or my health, but extends to those around me (my family), and to the environment in which we live.

Kids camping around the bonfire at our farm
My children have been the ones most intrigued by this process of evolution. I have been galled a greenie and a hippie, both terms which I fully embrace....and am proud to wear. Sometimes I feel like a chameleon or a superhero with a phonebox (hard to find one these days?) changing booth as I swap between my roles as a legal secretary and earth loving, environmentally-friendly-greenie-hippie.The transition occurs as soon as I start driving towards my home after work or the gym.

I look forward to the open arms and warm embrace of my loving home and family. I look forward to cooking a healthy, balanced meal from scratch and look forward to the day when more of the produce that makes it is my own.

Paul's marrow from a few years back

I have goals, dreams and ambitions that centre around my home again. Mother nature can knock me and my family down but we can get back up again, again and again. We have done and will continue to do so, but I am glad that I have rekindled my love for my farm. There is even beauty in the flood photos...one just has to look at the bigger picture to see it.


So, my fun journey towards a simpler life is just beginning and I have had to absorb a lot of information and learn things I never knew how to do. I don't expect I will succeed at everything and I will post a guide to where I started, just in case some are as overwhelmed as I was with the not-so-simple side of simple living. Choosing what to do first and what changes to make when faced with so many avenues for those changes is a little daunting at first but well worth the ride.

Cheers
Tanya

Sunday, 29 September 2013

Wardrobe Declutter 2

Today I feel like a Hollywood star. My new wardrobe is the stuff of dreams, like the ones featured in movies with perfectly organised clothing hanging in ordered rows. As a bonus I can even walk in and out without falling head-first into the chaos of discarded wrong-sized clothing. Ta-dah (drumroll)....here it is!


Hardly looks like the same space I posted yesterday. The shoes have all been matched (and a dozen pairs culled). Even had room to put Paul's shoes on the racks too. The rug was my Hollywood glamour touch and looks far more inviting here than it did leading into our ensuite bathroom. It also feels beautiful and soft beneath your feet.


I was particularly fastidious (some would call it anal) with my side of the wardrobe and ironed all of my skirts and pants. I tend to favour tops that don't require ironing and dresses that don't crease as I spend a lot of time sitting at my desk at work.


The area under Paul's jackets and pants is now completely cleared, and one of the shelves utilised for his vitamins which were cluttering up his bedside table.


I now know exactly what is up the top of my wardrobe. Everything was sorted and culled of useless clutter.


I even labelled boxes of clothing - too small, too big (yay! but will still keep just in case) and winter items.


 I like to do this every year - get in to the habit of storing my work clothes as outfits, complete with matching jewellery. It takes the indecision away, and the throwing on the floor of clothing that doesn't suit or doesn't fit. With my work dresses included, I now have twenty co-ordinated outfits hanging on one side of my wardrobe - that's four weeks worth! I knew I had a lot of clothes but until I lost weight I was only wearing one or two pants and skirts. I am now reaping the benefits of the gym work and the best thing is I don't need to spend a cent because so many of these outfits have not been worn for years.


To save space I have hooked the hanger for the top onto the hanger for the skirt/pants. This makes it less bulky on the railings and the outfit stays together.

So there you have it. The results of eight hours work. A happy contented mum with her posh wardrobe and a grateful Salvation Army who will be the beneficiary of six bags of quality clothing and shoes. What a load off my shoulders. I feel so unburdened that I am already planning next weekend's declutter.

Do you do a spring clean? How do you organise your wardrobe?

Cheers
Tanya

Wardrobe Declutter Part 1


I am ashamed to admit that this is the inside of my walk in robe. It is a never ending battle to keep tidy and as Paul and I are losing weight, we have far too many clothes. Every year I do a big spring cleanup, try on all my clothes, store the winter ones up the top and take a few bags to the op shop. We both have professional jobs so most of our clothing is work wear.


This is my side of the robe. I have four shelves for fold ups, two-tiered shoe racks and two rows of hanging space. Winter jackets and work suits take up a lot of room. There are also way too many pairs of shoes that I don't wear any more - some I have never worn :)


This is Paul's side which is way out of control. Because we both work full time he does his own ironing. I usually just hang the un-ironed shirts up for him to choose from and he irons every morning as part of his routine. However, he has so many shirts now that we need to do a major cull.


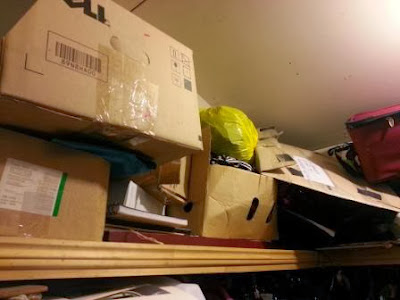
This is our storage area for unused items and momentos. Everything has just been tossed up there haphazardly and needs to be sorted.


I don't even know what is in these boxes...better get cracking.

I love the feeling when a job like this gets completed. It will save me time in the mornings getting ready for work and will increase my wellbeing just by walking into an uncluttered space every morning.

Will post my end result. I can see many hours of work here.

Cheers
Tanya


Saturday, 28 September 2013

Weekend Gardening Progress


What a difference hard work makes

The past few weekends have been spent out in the garden digging, clearing weeds, preparing beds and planting. I ordered in a load of topsoil to replenish the soil level which has dropped as the result of flooding. I mistakenly topped the garden with bark chips once - needless to say they all floated away. The mulch that has rested for several months tends to stay in place. The water rises slowly here, it does not come through in a raging torrent. Todays photos were taken just before the storm we are expecting so they are not as bright and sunny as usual.


A huge improvement around the water tank. The soil here was amazingly fertile with heaps of worms. I was able to dig down to about 30cms and gave it a good turning over before adding the topsoil. The landscaping place I ordered the soil through advised me it had been fertilised with chicken poo so I did not add any further manure.


The celery is thriving without the weeds. This side is north facing so it gets full sun for most of the day, and is shaded by the house in the afternoon.


The row of Bok Choi I planted in front of the dwarf beans is thriving. I have fertilised them once with worm tea and they seem to like it. The dwarf beans on the other hand have not developed as much as I thought they would by now. They get full sun but I did read that they don't like too much attention so I may have watered them a little too much? I am only watering them every second day now so will see what happens.


This is what I call my flood rose. Its the only one to survive this bed. The others took a beating when the tank moved last year. I cut it back two weeks ago and this is my reward. It seems happy to sit amongst the vegies.


My snow peas and tomatoes have a unique trellis base. I recycled the boys old bedheads as their bases broke so they were of no use (that's what I get for buying cheap beds).


Amazing to find the rose bush again. It is already shooting new leaves and I had forgotten the azalea behind it which I am hoping will come good too.


I have planted my organic nasturtiums around the windmill. they are already starting to flower. Looking forward to trying them out in a salad or two.


This was hard work but the transformation is amazing - the benefits of having two fit 14yo boys to help. Notice the boat has moved from the lawn of the dead vehicles. Paul is on holidays this week so progress is being made on the bigger things too.


I have planted a few zucchini and squash on this side and cucumbers behind the lemon tree. They have all grown from seed and coming along really well.


The boys helped me with this garden too. You can see that even though it is under the trees it still gets a lot of indirect light and full sun at the front. The passionfruit vine is no longer climbing up into the trees and has been trained around the garden fence.


I have planted rows of spinach, silverbeet, chinese greens, kale and rhubarb. It gets very hot here over summer so I had great success planting these types of vegies here a few years ago. The only maintenance is clearing the leaves away from the plants. It does not get very many weeds.


So, there you have it. My updated garden tour. It gives me great satisfaction to water every morning. I could set up a sprinkler system but I enjoy the watering and checking on the progress of my seedlings. It gives me time to reflect on my day before I go off to work and 6am at my farm is a beautiful time of day to be up and about.

Can't wait to be eating my own vegies. I am already planning more garden beds with my leftover topsoil

Cheers
Tanya


Friday, 27 September 2013

Compost help


Calling all composting experts!

Time for another confession. I have never started a compost heap before. When I first started researching organic gardening the most important thing stressed by everyone was to start a compost heap. Some even suggested percentages of each type of matter I should be contributing to it but I have found it is sometimes difficult to measure as the pile gets larger. I do not have a compost bin nor a tumbler so I started my compost on a pile of leaves next to my shadehouse and under the gumtrees. The leaves themselves I figured were already an ecosystem as they were probably a foot deep before I started adding layers. This position gets both direct sun and full shade, depending on the time of day.

To cordon off my heap I used one side of the shade house and two old single bed bases to form a three sided, well aired compost bay. I added everything included on the list I compiled from all the sites I read:

Fruit and vegetable scraps - no onion or citrus
Twigs - not too big, just enough to aerate
Grass clippings 
Cuttings
Soil
Leaves
Charcoal dust - from the bonfire brought up in a wheelbarrow
Hair - my daughter is a hairdresser and cuts her brothers hair

I left it for two weeks, watered it a couple of times but did not cover it which Paul thought I should. Should I put a tarp or something over it? I did surprise a small brown snake the first time I added scraps but have not seen one since. We would need to be careful if it does require covering though. We also get huge goannas here which I expected would be attracted by the food scraps...so far I have not seen one. Touch wood, they scare me more than the snakes.


I got a fork to it on the weekend and turned the heap over several times. I could see a bit of breakdown in the very bottom of the pile but the top layers were fairly dry.


I added some shredded paper, some more soil and scraps and will check back again after the rain this weekend. How often should I turn the heap over? Do you think I have the right mix of ingredients?

The finished result
Whatever the result, I have discovered great satisfaction in recycling my food scraps. Reminds me of when we had chickens, which I miss, so the chook house project is gaining more importance on my list. I have had to put a sign on my scrap bucket so it does not get filled with meat scraps, bones and onions. The kids are also learning to save the citrus peel to make vinegar based cleaner. I always have a jar or two of it going in the kitchen at all times.

I was wondering if anyone has used a bokashi bucket? The idea of being able to recycle the meat scraps as well is appealing to me, so that may be on my Christmas list...but I understand there is an ongoing cost with the bran.

I will make a great organic gardener one day...the main thing is I have made a start on my apprenticeship and composting takes a few months I believe. I have plenty of those to spare.

Cheers
Tanya

Thursday, 26 September 2013

Almond Berry Oatmeal


All you need to make a beautiful healthy breakfast
This is my weekday breakfast. It is kind of a ritual for me now. I put it on before I water my gardens and go for my walk. When I get back it is perfectly creamy and just the right temperature for eating. I adapted this from a Curves Complete recipe. I attend the local Curves gym after work four nights a week and follow their diet program for $20 a week. Bargain! I have lost 7kg in three months and still counting. Here is the link if you want more information http://www.curvescomplete.com/ or I will probably do a blog about it in the future.

Almond Berry Oatmeal

This recipe will serve 1 person. It is very good for you and the cinnamon in particular serves to boost your metabolism.

Ingredients
1/2 cup quick cooking oatmeal
1/4 cup slivered almonds
1/2 cup berries of your choice ie. strawberries, mulberries, blueberries. (If I don't have fresh ones I use frozen ones which still works out fine)
1/2 cup almond milk (skim milk is fine also)
1 teaspoon cinnamon
1/4 cup water
Sugar or Stevia

For the first step, I place the oats and water into a deep microwave bowl. I use an old small mix-master bowl. The reason I say a deep bowl is that I have had it overflow and make an awful mess in the microwave.
Microwave on high for two minutes and then mix in a little of the milk and stir.


Next place your berries on the top, add the cinnamon and slivered almonds. I sometimes also add chia seeds of lsa (flaxseed mix) at this stage for extra fibre. Add the rest of the almond milk and stir, then microwave for further 3 minutes on high. Go for your morning walk.....


When you return you will have a berry-coloured bowl of almond oatmeal. Give it a stir and add milk according to how thick or runny you like it. I then add two teaspoons of stevia to sweeten. Heat for another 30 seconds if too cool.

Sit down with your coffee and enjoy!!

Cheers
Tanya

Balcony Garden Workshop


My husband is not really into gardening and I think he finds my current enthusiasm for it a little amusing. He does things like line trimming and mowing which is a big help and he recently surprised me with some beautiful pots from the local clearance store. I looked at them for a while before deciding that they would be perfect to display on our second floor balcony. Its a place I walk past and spend time on every day as it leads into our kitchen and has great views of our farm...it also leads downstairs.

Some would think it odd that our kitchen is upstairs but after our second or third flood Paul said that he would not be moving any more fridges or freezers upstairs during the floods (when it is usually raining of course, so I can't blame him for that). I loved our downstairs kitchen - a huge wide room with two sunny windows and room for a large dining table. It was the hub of our downstairs living area.

My old country kitchen
Some of you may recognise the black and silver cabinets. They are Stanley work cupboards, made out of plastic (with metal fronts) and totally waterproof. We bought them at Supercheap auto. They are made for toolsheds and workshops but with the stainless steel benchtops Paul picked up at an auction, they suit our purpose well. Our previous kitchen was the standard chipboard/laminate which was ruined in the first flood. These cupboards have been under flood several times and we just pressure clean them afterwards...good as new.


This is our upstairs kitchen which is also our living room. Being upstairs it is very practical because our main bedroom and my office are upstairs also. Paul and I could live here self contained and only go downstairs to use the laundry...if we had no children of course.

It needs a repaint and I have some holidays coming up at the end of next month so will put a few decorating ideas to use then. Now that I have sidetracked, back to the balcony which leads off the kitchen. These are the beautiful green pots Paul bought me, displayed with my herb pots on a recycled frame the kids were no longer using downstairs.


Also in the shot is a tangelo tree which I am considering potting...any thoughts on that idea?


This is the rest of the balcony/verandah. I also found another set of metal shelves which I painted the same iron grey as the railings and this has become my substitute nursery/potting station...until I can get my shadehouse fixed.

A handy place to keep my tools, fertilisers and pots

My organic fertilisers

The toilet roll garden
I usually take my blog photos when the family are not around because I tend to get ribbed for taking photos of plants and food etc. They say I am becoming a hippie and maybe I am. You can imagine the ribbing I got when I photographed these toilet rolls. I used recycled meat and vegetable trays (washed in hot water) to sit the rolls in. I have read about this idea and thought I would give it a go with some Thai basil seeds. Apparently you can just plant the seedlings in the ground, toilet rolls and all... it will be a great way of recycling the many toilet rolls we accumulate. Have you tried this?


I was recently given the little freezer for free and it will be put to good use when I harvest and freeze my left over vegetables. Above it you can see the inverter for our solar panels. We have a 5 kilowatt system and as it was only installed in June we have yet to see how much money it will save us.

Guess I am becoming a greenie/hippie. Not such a bad thing to be I am thinking, especially considering my day job in a lawfirm :)

Cheers
Tanya


Wednesday, 25 September 2013

Mulberry Pancakes


Our enormous mulberry tree which survived the late frost
One of our favourite traditions at the farm is the annual mulberry picking. Last year my husband, Paul cut the tree right back after the frost so we did not get very many berries. But this year is a different story...we had plenty of rain all through winter and it was very mild with only a couple of smaller frosts.


On the weekend we managed to pick a large bucketful of mulberries. There are still tons more on the tree that are not yet ripe so I figure we will get another two weeks before they are gone for the year.


The shame with mulberries is they only fruit for two to three weeks and then they are gone. They also don't keep for long in the fridge if you pick them ripe, so they need to be cooked or eaten (no problems there) as soon as possible. I keep them in the fridge in a recycled strawberry or blueberry punnet to have with my oats for breakfast and the rest I stew up to make pies or our all time favourite family breakfast....

Mulberry pancakes


The first step to prepare the berries for stewing is to wash them in cold water to remove any dirt or pests. The next job is to remove the stems. If you pull the stem out you will end up with a pretty squished berry so I usually just cut the tips off with a sharp knife and place the ends in my compost. Your fingers will be very purple by the end of this process and people say you can remove the dye by rubbing your fingers with a green mulberry but I have found this doesn't work...and it's a waste of what will grow into another ripe mulberry! A liquid soap or hand sanitiser will do the job effectively.


For this batch of stewing I had the following ingredients:

3 cups mulberries
1 cup sugar
1/2 cup water

As the berries will release a lot of juice when cooking you don't need to add a lot of water but we like to pour the syrup over the top, so this quantity will allow for that.

Place your clean and de-stemmed mulberries in a saucepan over low heat and simmer covered for about 20 mins.


I like the berries to still hold their form and be firm in the stew but if you like your berries mushy you could stew for a further 10 mins. 

I then make a basic pancake dough with the following ingredients:

1 egg
1 1/2 cups self raising flour
pinch salt
1/2 cup milk

It is important that the dough be quite thick and well mixed because you don't want to squish the berries too much by over-stirring. You can then add about 3/4 cup of stewed mulberries (the rest we freeze for pies/cakes) or according to your taste, and stir in. Add more flour if the mixture is too runny, then cook in a butter-greased frypan over medium heat. This recipe served nine of us with two to three pikelet-sized pancakes each.


To top it off we serve the warm pancakes with ice cream, a few fresh berries and syrup drizzled over the top. Yum!! Any other suggestions for what to make with my frozen stewed mulberries?


After a full belly of pancakes, I then drove to the duckpond markets to buy fresh eggs (fixing the chooky pen is on my wishlist) and seedlings. I came home with two litres of worm fertiliser (hmmm worm farm for Christmas?) from the organic gardener and the above seedlings which include kale, beetroot, red onion, parsley, nasturtium, english spinach and an artichoke (wrong time of year for here I think?) just for fun. Now to finish those gardens.....

Cheers
Tanya
Related Posts Plugin for WordPress, Blogger...