

I make my own home-made yoghurt every second weekend, and if you want something simple to start off your simple living journey, then I urge you to give it a go. It is so easy to make and costs less than half what you pay in the stores. I find that my batch keeps for two weeks in the fridge and I use the last of it to make the next batch, so I always have a supply.
I use a recipe from Rhonda at Down to Earth as it turns out perfectly every time, and I now make it with skim milk to reduce the calories...and it still comes out creamy, even with standard Aldi milk.
The important thing with yoghurt, as with cheese making and preserving, is to make it in sterile conditions and store in a sterile container. Rhonda suggests heating the milk even if it is pasteurised to ensure all bacteria is removed from the milk. This will help the production of the good bacteria, which is introduced via a culture or starter, in this case existing yoghurt.
EQUIPMENT REQUIRED
- Sterilised jar/s - approx 1.5L
- Whisk
- Spoon
- Small saucepan
- Two towels
- 1.4 litres/quarts milk - this can be full cream, skim, UHT, powdered
- 2 tablespoons good quality natural yoghurt with live cultures and no added gelatine
- 2 tablespoons powdered milk

- Sterlise the jar, lid, whisk and spoon in a pan of boiling water or in the oven for ten minutes.
- Pour the milk into the saucepan.
- Add the milk powder and whisk it in making sure the milk powder is completely dissolved.
- Heat to 90C/195F - I have a cheese thermometer that sits on the side of the pan but the first time I made this cheese I just held a meat thermometer in the milk, which works just as well - make sure you sterilse it too though.

- Take the milk off the heat and let the saucepan sit in a sink, with about 10cm of cold water. This will help cool down the milk quickly.
- When the milk reaches about 45C/113F - but no higher than 50C/122F - add two tablespoons of yoghurt and whisk in thoroughly.

- Add the yoghurt to the jar/jars and seal the lid. I use three pasta sauce jars which fit nicely in my fridge.
- Wrap the jar/jars in two towels, to make an insulated parcel.
- Let this sit on the bench in a warm spot, away from drafts - I usually prepare my yoghurt late morning and leave it on the bench all afternoon.
- Later in the afternoon, heat the oven up for about 5 minutes, then turn off the heat.
- Place the parcel in the oven and leave it there, untouched, till the next morning.

Beautiful fresh natural yoghurt for breakfast...now how good is that. I enjoy the taste of natural yoghurt but my kids like it flavoured and sweetened so I just add a little grated palm sugar and mix in whatever fruit or fruit puree I may have on hand. Apparently jam mixed in is a quick way to convert it. I also use this yoghurt in the place of sour cream or cream in recipes or meals.
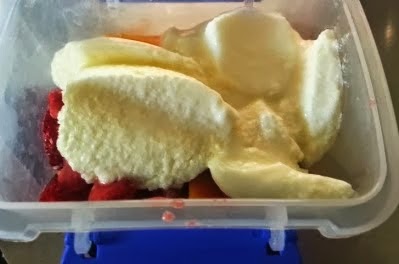
Every so often I will further process the yoghurt and make creamy Greek yoghurt. This involves straining the natural yoghurt through your muslin or cheesecloth in the fridge overnight.

You don't end up with as much yoghurt (about half the quantity), but it is beautiful and creamy and not at all sour.

So, there you have it. How easy is that? Takes about ten minutes to prepare, and is a wonderful additive free product for your family....full of natural probitics! Plus my kids eat tons of it...so the dollar savings are considerable.
Do you make your own yoghurt?
